No, I didn’t even knew what “a brush” was, before a saw this Instagram post of Adrifreeskate a short while ago. But here I am, making this post how to do one, before I even perfected it myself.
But to begin with:
What is a brush on inline skates
This is it ⬇️
And why on earth would I (or you!) want to do this?
- Because I think it looks cool
- Plus it is a nice addition now I know how to do a crossover
- And practicing this kind of movements make me more versatile and confident on my skates
However I watched this Instagram post over and over and over again. I just didn’t get it! That’s when I thought – all ready with my cones placed on the pavement but only but question marks in my head – I have to draw this out ✍🏻
Hereby I present you: the 4 steps in making a brush on inline skates!
Step 1 doing a crossover
I started learning crossovers with the help of the short streakes (stripes?) on the bike path. Yes, I live in the Netherlands, where you will find lots of those paths. If you don’t have them, just draw them with some crayon. About a meter apart. And why you should start with crossovers with streakes or self-made drawings of the road? Because you cannot fall over them.
You already have “to worry” about not falling over your own skates when practicing crossovers. And when you’re done practicing and ready you can buy some cones. Big tip: buy small and “heavy” cones. I bought (cheap) and farely wide cones at the Action store. And with a little bit of wind they go all over the place. Don’t be a cheapskate (like me).

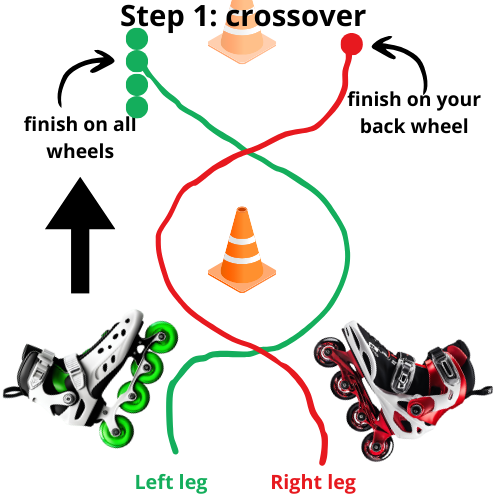
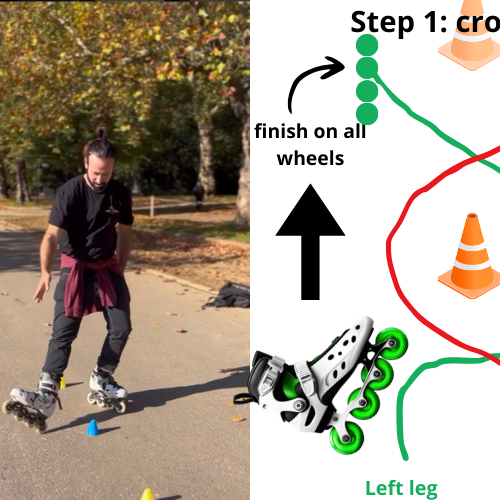
Cross your skates (right before left skate) before the first cone and end at the second cone. With your left skate on all wheels and your right skate only on the back wheel.
Step 2 Turn with heel compass
Next trick is to rotate around your right skate. This skate put on his back wheel, while your left skate rotates around the second cone.
When you’re done with this, your are the other way around.

Difficulty with this one is to create movement with only that left leg. To achieve this you will you need to place your inline skate diagonally outwards and apply force with your thigh and knee.
Step 3 change foot position
Solely for this movement alone I had to watch the Instagram post like dozens of time.
There you are, standing “backwards”. At this moment you have both inline skates on all wheels. You’re in some kind of V-shape with your feet, but apart from each other. After this, your right skate goes backwards: behind your left skate.
Next to this, you move your left skate backwards. Now your standing in a T-shaped position. Like a T-stop the other way around.

Step 4 rotate

Good news! You’re almost there! Bad news, this one could be awkward. You’re in a T-stance with your left skate diagonally to the left and the front wheel of your right skate is almost against your left skate.
To rotate these two skates, you have to use your upper body and even use a bit of a swing with your left shoulder. With this you can make a turn to the left.
Don’t forget to stay balanced and keep your knees bent, slighty bending your body forwards.
And there you are, you did it. Congratulations 🔥
Final thoughts
For this post I again had to find out how to embed an Instagram post on a WordPress website. For this I created this post on my page, so I will never forget this again. And maybe it can help you out too.


